ETH智能合约开发(vue + 智能合约)
一、什么是ETH智能合约
说白了就是一段可以运行在以太坊平台上的代码,应用中,我们可以使用 Solidity 来编写和区块链交互的智能合约,
合约编写好之后,我们通过一个有余额的外部账户将合约部署到以太坊节点上,
并运行合约(使用 Truffle 框架可以更好的帮助我们做这些事情)
二、Truffle 和 ganache-cli 简介
Truffle Truffle是Dapp开发框架,他可以帮我们处理掉大量无关紧要的小事情,
让我们可以迅速开始写代码-编译-部署-测试-打包DApp这个流程。
Truffle是使用Nodejs开发的,我们首先需要安装Nodejs运行环境。
ganache-cli是以太坊节点仿真器软件ganache的命令行版本,可以方便开发者快速进行以太坊DApp的开发与测试。
1、Truffle安装
查看node版本 没有安装node的请自行google安装
# Nodejs版本
> npm -v
6.0.0
> node -v
v8.9.4
全局安装Truffle工具。
npm install -g truffle安装完成后查看命令行是否安装成功
> truffle
Truffle v4.1.12 - a development framework for Ethereum

Usage: truffle  [options]

Commands:
  init      Initialize new and empty Ethereum project
  compile   Compile contract source files
  migrate   Run migrations to deploy contracts
  deploy    (alias for migrate)
  build     Execute build pipeline (if configuration present)
  test      Run JavaScript and Solidity tests
  debug     Interactively debug any transaction on the blockchain (experimental)
  opcode    Print the compiled opcodes for a given contract
  console   Run a console with contract abstractions and commands available
  develop   Open a console with a local development blockchain
  create    Helper to create new contracts, migrations and tests
  install   Install a package from the Ethereum Package Registry
  publish   Publish a package to the Ethereum Package Registry
  networks  Show addresses for deployed contracts on each network
  watch     Watch filesystem for changes and rebuild the project automatically
  serve     Serve the build directory on localhost and watch for changes
  exec      Execute a JS module within this Truffle environment
  unbox     Download a Truffle Box, a pre-built Truffle project
  version   Show version number and exit

See more at http://truffleframework.com/docs
2、全局安装ganache-cli
npm install -g ganache-cli三、创建项目
> cd ~
> mkdir truffle-crowdfund
> cd truffle-crowdfund
# 初始化项目
> truffle init
Downloading...
Unpacking...
Setting up...
Unbox successful. Sweet!

Commands:

  Compile:        truffle compile
  Migrate:        truffle migrate
  Test contracts: truffle test
四、启动测试节点
ganache-cli它会自动给我们生成10个带有100个eth的账户
五、接下来写合约代码并部署到测试网络上
需求:
假设我准备出版一本区块练技术书籍,但是不确定有多少人愿意购买这本书,于是我发起了一个众筹, 如果在一个月内,
能筹集到 10 个 ETH,我就进行写作,并给参与的读者每人赠送一本书,如果未能筹到足够的资金,
参与的读者赎回之前投入的资金。
同时,为了让读者积极参与,初始时,参与众筹的价格非常低(0.02 ETH),每筹集满 1 个 ETH 时,价格上涨 0.002ETH。
归纳出合约三个对外动作(函数):
1、汇款进合约,可通过实现合约的回退函数来实现。
2、读者赎回汇款,这个函数仅仅在众筹未达标之后,由读者本人调用生效。
3、创作者提取资金,这个函数需要在众筹达标之后,由创作者调用。
除此之外,还需要一个状态变量来保存以下状态:
1、用户众筹的金额,使用一个 mapping 来保存。
2、当前众筹的价格,以及一个相应的内部函数逐步上涨价格。价格可以使用一个 uint 来保存。
3、合约众筹的截止时间,用 uint 来保存, 在合约创建时往后追加 30 天,在构造函数中完成。
4、记录合约众筹的收益者,即创作者,在合约创建时在构造函数中进行赋值,合约创建者就是创作者。
5、再加入众筹状态,如果众筹停止阻止用户在参与。创作者提取资金时及时关闭众筹。
实现众筹合约
我们进入到上面使用truffle init命令创建的项目中去
在 contracts 下创建一个合约文件 Crowdfunding.sol:
pragma solidity >=0.4.21 <0.7.0;


contract Crowdfunding {
    // 创作者
    address public author;

    // 参与金额
    mapping(address => uint) public joined;

    // 众筹目标
    uint constant Target = 10 ether;

    // 众筹截止时间
    uint public endTime;

    // 记录当前众筹价格
    uint public price  = 0.02 ether ;

    // 作者提取资金之后,关闭众筹
    bool public closed = false;

    // 部署合约时调用,初始化作者以及众筹结束时间
    constructor() public {
        author = msg.sender;
        endTime = now + 30 days;
    }

    // 更新价格,这是一个内部函数
    function updatePrice() internal {
        uint rise = address(this).balance / 1 ether * 0.002 ether;
        price = 0.02 ether + rise;
    }

    // 用户向合约转账时 触发的回调函数
    function () external payable {
        require(now < endTime && !closed  , "众筹已结束");
        require(joined[msg.sender] == 0 , "你已经参与过众筹");

        require (msg.value >= price, "出价太低了");
        joined[msg.sender] = msg.value;

        updatePrice();
    }

    // 作者提取资金
    function withdrawFund() external {
        require(msg.sender == author, "你不是作者");
        require(address(this).balance >= Target, "未达到众筹目标");
        closed = true;
        msg.sender.transfer(address(this).balance);
    }

    // 读者赎回资金
    function withdraw() external {
        require(now > endTime, "还未到众筹结束时间");
        require(!closed, "众筹达标,众筹资金已提取");
        require(Target > address(this).balance, "众筹达标,你没法提取资金");

        msg.sender.transfer(joined[msg.sender]);
    }

}
代码的介绍,在合约代码中,使用到了 Solidity 语言中的一些知识点:
ether : 这是货币单位
。
days : 这是时间单位,1 days 对应 1 天的秒数。now : 这是一个 Solidity 的内置属性,用于获取当前的时间戳,单位是秒。
require : 如果条件不满足回退交易。
address.transfer(value) : 对某一个地址进行转账。
有关 Solidity 语言入门推荐大家使用官网课程 僵尸游戏
合约部署
部署之前我们使用 truffle compile 命令来进行编译
之后,在 migrations 下创建一个部署脚本 2_crowfunding.js ,内容如下:
const crowd = artifacts.require("Crowdfunding");

module.exports = function(deployer) {
  deployer.deploy(crowd);
};
接下来你的文件目录应该是这样的:
├── build
│   └── contracts
│       ├── CrowdFunding.json
│       └── Migrations.json
├── contracts
│   ├── CrowdFunding.sol
│   └── Migrations.sol
├── migrations
│   ├── 1_initial_migration.js
│   └── 2_crowdfunding_migration.js
├── test
└── truffle-config.js
注意一下这个1_initial_migration.js文件和 Migrations.sol文件 这是我们在使用truffle init命令初始化项目时它为我们生成的文件 这两个文件是不能删除的否则会无法进行部署,我们在migrations文件夹下面创建的文件要按照 1_xxx.js, 2_xxx.js 在部署的时候是按照这个顺序进行的。
下面我们配置部署脚本truffle-config.js
配置之前 我们还需要做一些事情:
1、注册infura获取PROJECT-ID
infura是基于ETH的chain公共API服务,为开发者提供链上数据查询、交易广播等功能。
注册成功之后需要创建项目
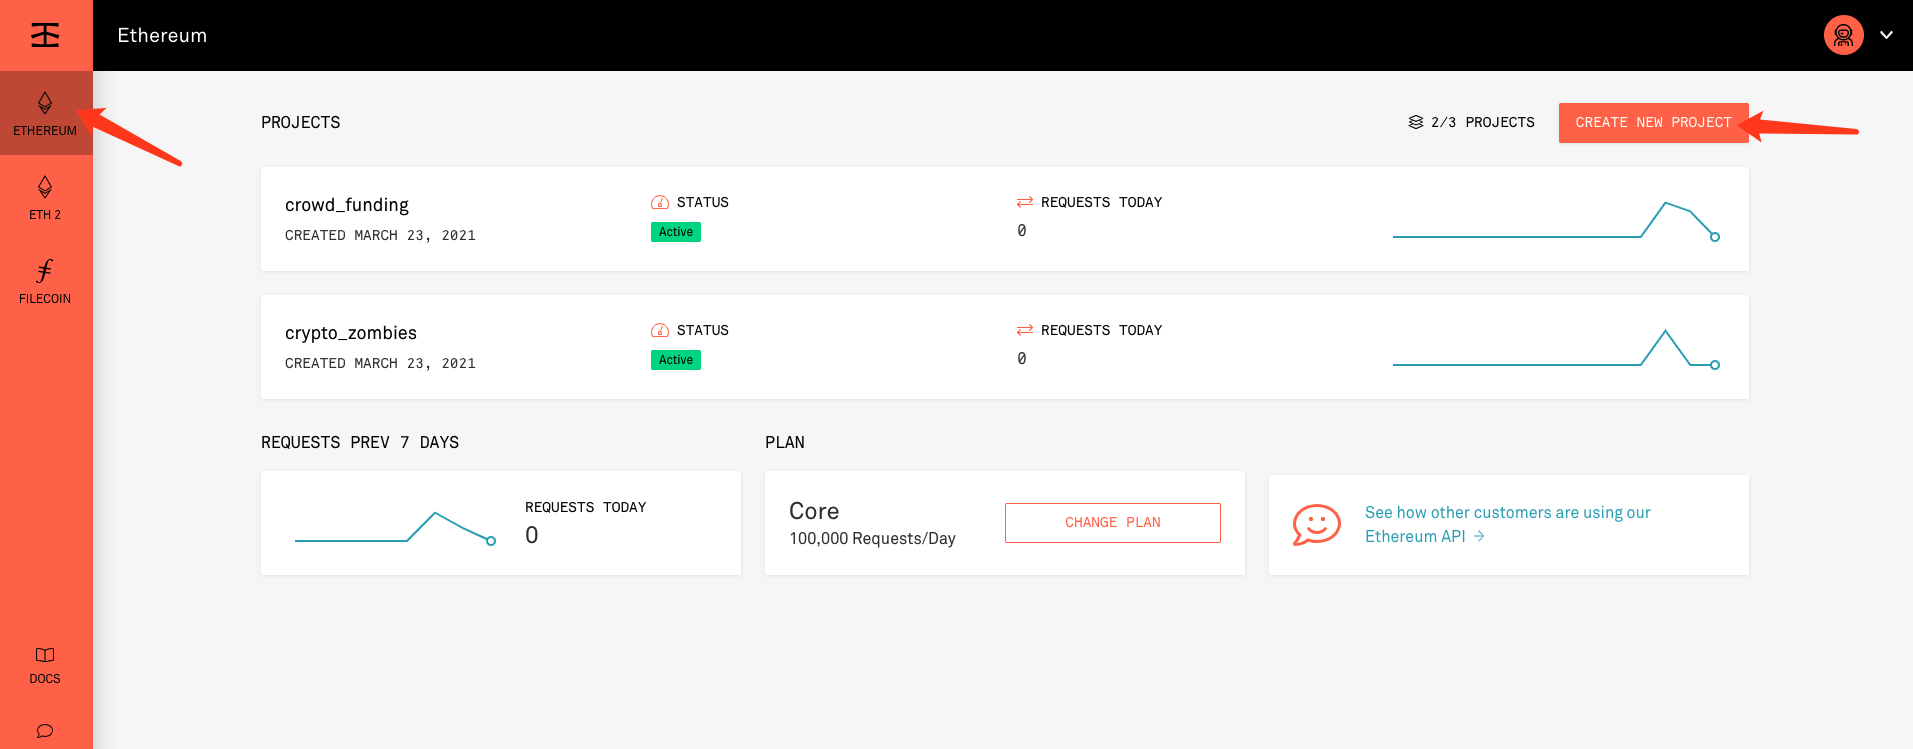
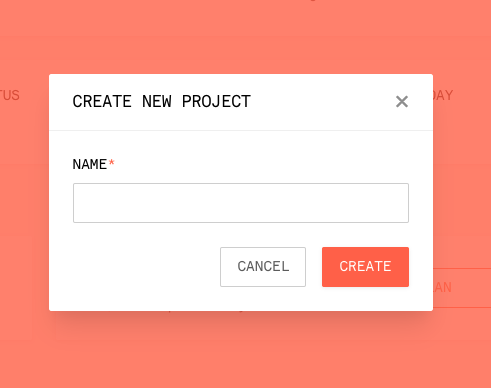
项目名字是随便起的无所谓
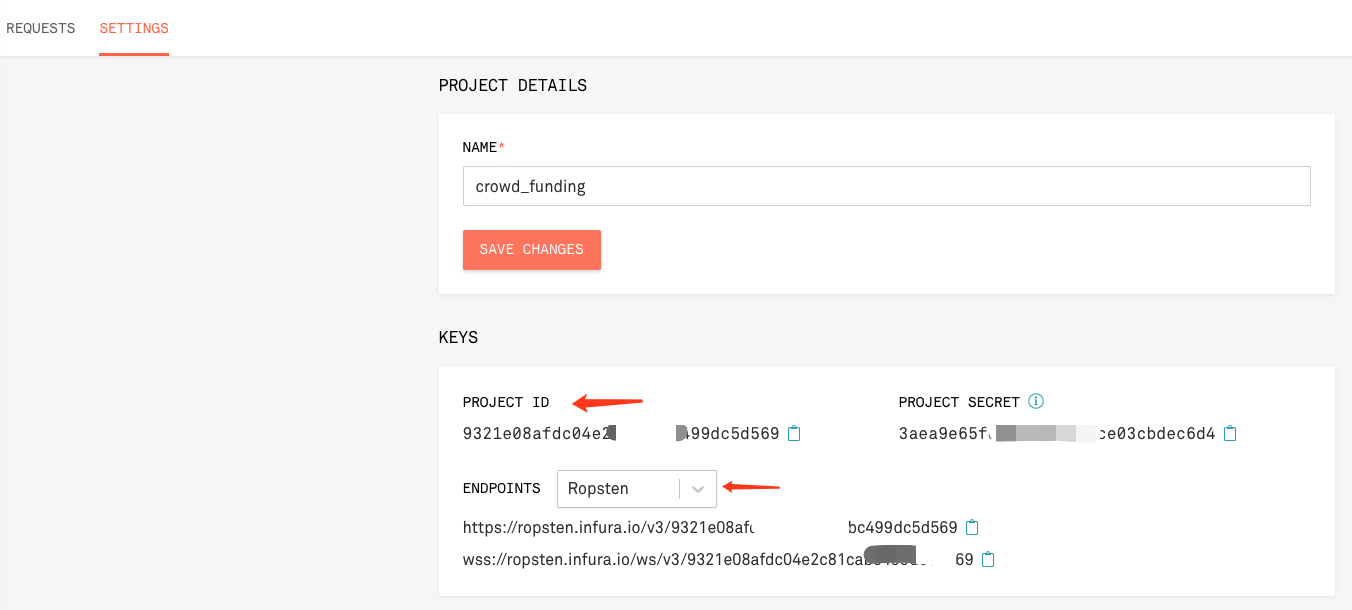
项目创建完之后你就能看到PROJECT-ID了这个我们待会要用
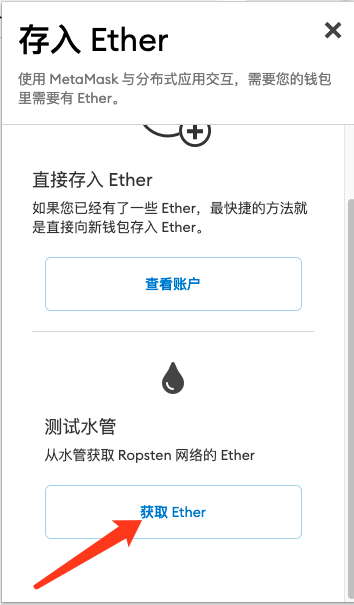
2、我们还需要一个浏览器插件 MetaMask 推荐大家使用Chrome浏览器
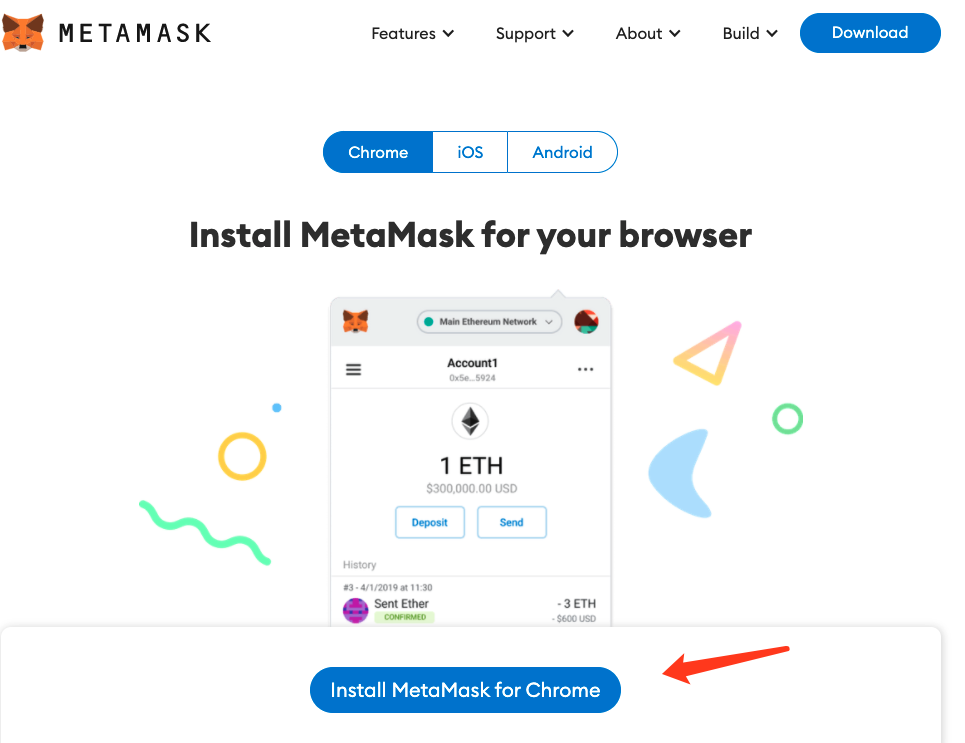
按照步骤注册账户,并将助记词保存下来, 我们下面要用到
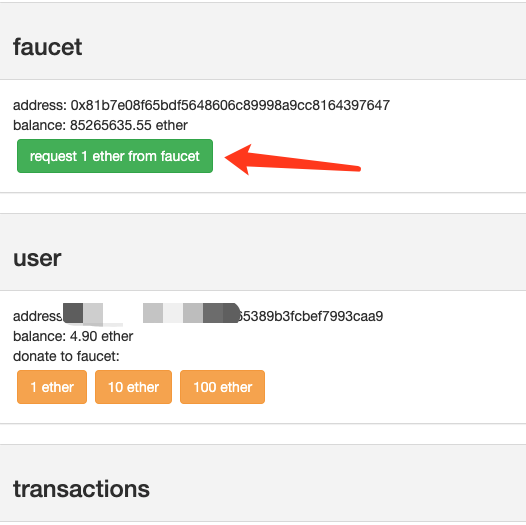
我们需要获取ETH,以为部署是要gas费的, 测试网络可以每天给我们5个ETH 这足够我们使用了

3、安装 truffle-hdwallet-provider
由于需要将合约部署到测试网Ropsten,此过程需要部署者私钥进行签名再将数据进行广播,truffle-hdwallet-provider是truffle上提供交易离线签名的模块
注:必须在truffle框架的代码目录下安装,否则不生效
> cd truffle-crowdfund
> npm install truffle-hdwallet-provider4、我们终于可以进行修改truffle-config.js部署脚本了
/**
 * Use this file to configure your truffle project. It's seeded with some
 * common settings for different networks and features like migrations,
 * compilation and testing. Uncomment the ones you need or modify
 * them to suit your project as necessary.
 *
 * More information about configuration can be found at:
 *
 * trufflesuite.com/docs/advanced/configuration
 *
 * To deploy via Infura you'll need a wallet provider (like @truffle/hdwallet-provider)
 * to sign your transactions before they're sent to a remote public node. Infura accounts
 * are available for free at: infura.io/register.
 *
 * You'll also need a mnemonic - the twelve word phrase the wallet uses to generate
 * public/private key pairs. If you're publishing your code to GitHub make sure you load this
 * phrase from a file you've .gitignored so it doesn't accidentally become public.
 *
 */

const HDWalletProvider = require('truffle-hdwallet-provider');
// const infuraKey = "fj4jll3k.....";
//
const fs = require('fs');
const mnemonic = fs.readFileSync(".secret").toString().trim();

module.exports = {
  /**
   * Networks define how you connect to your ethereum client and let you set the
   * defaults web3 uses to send transactions. If you don't specify one truffle
   * will spin up a development blockchain for you on port 9545 when you
   * run `develop` or `test`. You can ask a truffle command to use a specific
   * network from the command line, e.g
   *
   * $ truffle test --network <network-name>
   */

  networks: {
    // Useful for testing. The `development` name is special - truffle uses it by default
    // if it's defined here and no other network is specified at the command line.
    // You should run a client (like ganache-cli, geth or parity) in a separate terminal
    // tab if you use this network and you must also set the `host`, `port` and `network_id`
    // options below to some value.
    //
    mainnet: {
      provider: function () {
        // Setting the provider with the Infura Rinkeby address and Token
        return new HDWalletProvider(mnemonic, "https://mainnet.infura.io/v3/xxxx1cabc499dc5d569")
      },
      network_id: 1
    },
    // development: {
    //  host: "127.0.0.1",     // Localhost (default: none)
    //  port: 8545,            // Standard Ethereum port (default: none)
    //  network_id: "*",       // Any network (default: none)
    // },
    // Another network with more advanced options...
    // advanced: {
    // port: 8777,             // Custom port
    // network_id: 1342,       // Custom network
    // gas: 8500000,           // Gas sent with each transaction (default: ~6700000)
    // gasPrice: 20000000000,  // 20 gwei (in wei) (default: 100 gwei)
    // from: <address>,        // Account to send txs from (default: accounts[0])
    // websocket: true        // Enable EventEmitter interface for web3 (default: false)
    // },
    // Useful for deploying to a public network.
    // NB: It's important to wrap the provider as a function.
    ropsten: {
      provider: () => new HDWalletProvider(mnemonic, "https://ropsten.infura.io/v3/xxxx1cabc499dc5d569"),
      network_id: 3,       // Ropsten's id
      gas: 5500000,        // Ropsten has a lower block limit than mainnet
      confirmations: 2,    // # of confs to wait between deployments. (default: 0)
      timeoutBlocks: 200,  // # of blocks before a deployment times out  (minimum/default: 50)
      skipDryRun: true     // Skip dry run before migrations? (default: false for public nets )
    },
    // Useful for private networks
    // private: {
    // provider: () => new HDWalletProvider(mnemonic, `https://network.io`),
    // network_id: 2111,   // This network is yours, in the cloud.
    // production: true    // Treats this network as if it was a public net. (default: false)
    // }
  },

  // Set default mocha options here, use special reporters etc.
  mocha: {
    // timeout: 100000
  },

  // Configure your compilers
  compilers: {
    solc: {
      // version: "0.5.1",    // Fetch exact version from solc-bin (default: truffle's version)
      // docker: true,        // Use "0.5.1" you've installed locally with docker (default: false)
      // settings: {          // See the solidity docs for advice about optimization and evmVersion
      //  optimizer: {
      //    enabled: false,
      //    runs: 200
      //  },
      //  evmVersion: "byzantium"
      // }
    }
  },

  // Truffle DB is currently disabled by default; to enable it, change enabled: false to enabled: true
  //
  // Note: if you migrated your contracts prior to enabling this field in your Truffle project and want
  // those previously migrated contracts available in the .db directory, you will need to run the following:
  // $ truffle migrate --reset --compile-all

  db: {
    enabled: false
  }
};
注意这几行
const HDWalletProvider = require('truffle-hdwallet-provider');
// const infuraKey = "fj4jll3k.....";
//
const fs = require('fs');
const mnemonic = fs.readFileSync(".secret").toString().trim();

...

ropsten: {
  provider: () => new HDWalletProvider(mnemonic, "https://ropsten.infura.io/v3/xxxx1cabc499dc5d569"),
  network_id: 3,       // Ropsten's id
  gas: 5500000,        // Ropsten has a lower block limit than mainnet
  confirmations: 2,    // # of confs to wait between deployments. (default: 0)
  timeoutBlocks: 200,  // # of blocks before a deployment times out  (minimum/default: 50)
  skipDryRun: true     // Skip dry run before migrations? (default: false for public nets )
},
这里我们用到了 助记词 和 PROJECT-ID 我这里是在项目的根目录下创建了一个.secret文件 把助记词放到了文件里, 这样比较好,
你也可以使用变量进行保存 const infuraKey = "fj4jll3k....."
5、部署到Ropsten测试网络
执行truffle migrate --network ropsten 即可部署至Ropsten
如需要重新编译所有合约,可执行truffle migrate --network ropsten --reset --compile-all
Compiling your contracts...
===========================
> Everything is up to date, there is nothing to compile.


Starting migrations...
======================
> Network name:    'ropsten'
> Network id:      3
> Block gas limit: 8000000 (0x7a1200)


1_initial_migration.js
======================

   Deploying 'Migrations'
   ----------------------
   > transaction hash:    0xe27c86dc48219fa193d23843b301d6878a6820dcc93fd92a20e24d1ec9c49b31
   > Blocks: 3            Seconds: 14
   > contract address:    0x2e2982D9d1914b6580139Ec4E356B708478C875F
   > block number:        9898882
   > block timestamp:     1616554032
   > account:             0x270dF7D1f4612063abA065389b3fCbeF7993caA9
   > balance:             4.93502452
   > gas used:            193243 (0x2f2db)
   > gas price:           20 gwei
   > value sent:          0 ETH
   > total cost:          0.00386486 ETH

   Pausing for 2 confirmations...
   ------------------------------
   > confirmation number: 1 (block: 9898884)
   > confirmation number: 2 (block: 9898885)

   > Saving migration to chain.
   > Saving artifacts
   -------------------------------------
   > Total cost:          0.00386486 ETH


2_crowdfunding_migration.js
===========================

   Deploying 'CrowdFunding'
   ------------------------
   > transaction hash:    0x0f787b4d1567a00a8da4b28970632238fc50eb43ee7e33fb8d5c3d92fcbf5880
   > Blocks: 2            Seconds: 25
   > contract address:    0x3e32bF1e0Af404ed7DbCEf538BEba75ea2a76510
   > block number:        9898889
   > block timestamp:     1616554105
   > account:             0x270dF7D1f4612063abA065389b3fCbeF7993caA9
   > balance:             4.9224565
   > gas used:            582663 (0x8e407)
   > gas price:           20 gwei
   > value sent:          0 ETH
   > total cost:          0.01165326 ETH

   Pausing for 2 confirmations...
   ------------------------------
   > confirmation number: 1 (block: 9898890)
   > confirmation number: 2 (block: 9898891)

   > Saving migration to chain.
   > Saving artifacts
   -------------------------------------
   > Total cost:          0.01165326 ETH


Summary
=======
> Total deployments:   2
> Final cost:          0.01551812 ETH
六、使用vue项目与合约进行交互
利用 CrowdFund.vue 来众筹界面,众筹界面需要显示以下几个部分:
1、当前众筹到金额。
2、众筹的截止时间。
3、当前众筹的价格,参与众筹按钮。
4、如果是已经参与,显示其参与的价格以及赎回按钮。
5、如果是创作者,显示一个提取资金按钮。
1、 依然是创建一个vue项目
vue create crowd_funding_vue我们在components文件夹下创建一个CrowdFunding.vue文件 我们整个的CrowdFunding.vue文件就像是这样
<template>
    <div class="content">
        <h3> 新书众筹</h3>
        <span>以最低的价格获取我的新书 </span>

        <div class="status">
            <div v-if="!closed">已众筹资金:<b>{{ total }} ETH </b></div>
            <div v-if="closed"> 众筹已完成</div>
            <div>众筹截止时间:{{ endDate }}</div>
        </div>

        <div v-if="joined" class="card-bkg">
            <div class="award-des">
                <span> 参与价格 </span>
                <b> {{ joinPrice }} ETH </b>
            </div>

            <button :disabled="closed" @click="withdraw">赎回</button>
        </div>

        <div v-if="!joined" class="card-bkg">
            <div class="award-des">
                <span> 当前众筹价格 </span>
                <b> {{ price }} ETH </b>
            </div>

            <button :disabled="closed" @click="join">参与众筹</button>
        </div>

        <div v-if="isAuthor">
            <button :disabled="closed" @click="withdrawFund"> 提取资金</button>
        </div>

    </div>
</template>

<script>
    import contract from "truffle-contract";
    import crowd from '../../public/build/contracts/CrowdFunding.json';

    const Web3 = require('web3');

    export default {
        name: 'CrowdFund',
        // 定义上面HTML模板中使用的变量
        data() {
            return {
                price: null,
                total: 0,
                closed: true,
                joinPrice: null,
                joined: false,
                endDate: "null",
                isAuthor: true,
            }
        },
        // 当前Vue组件被创建时回调的hook 函数
        async created() {
            //  初始化 web3及账号
            await this.initWeb3Account()
            //  初始化合约实例
            await this.initContract()
            //  获取合约的状态信息
            await this.getCrowdInfo()
        },
        methods: {
            async initWeb3Account() {
                console.log("initWeb3Account 方法执行了-------");
                // 检查新版MetaMask
                if (window.ethereum) {
                    this.provider = window.ethereum;
                    try {
                        // 请求用户账号授权
                        await window.ethereum.enable();
                    } catch (error) {
                        // 用户拒绝了访问
                        console.log("User denied account access");
                    }
                }
                // 老版 MetaMask
                else if (window.web3) {
                    this.provider = window.web3.currentProvider;
                }
                // 如果没有注入的web3实例,回退到使用 Ganache
                else {
                    alert("请安装MetaMask!");
                     this.provider = new Web3.providers.HttpProvider("http://127.0.0.1:7545");
                }
                this.web3 = new Web3(this.provider);
                this.web3.eth.getAccounts().then(accs => {
                    this.account = accs[0]
                    console.log(accs)
                })
            },
            async initContract() {
                const crowdContract = contract(crowd)
                crowdContract.setProvider(this.provider)
                this.crowdFund = await crowdContract.deployed()
            },
            async getCrowdInfo() {
                // 获取合约的余额
                this.web3.eth.getBalance(this.crowdFund.address).then(
                    r => {
                        this.total = this.web3.utils.fromWei(r)
                    }
                )

                // 获取读者的参与金额
                this.crowdFund.joined(this.account).then(
                    r => {
                        if (r > 0) {
                            this.joined = true
                            this.joinPrice = this.web3.utils.fromWei(r)
                        }
                    }
                )

                // 获取合约的关闭状态
                this.crowdFund.closed().then(
                    r => this.closed = r
                )

                // 获取当前的众筹价格
                this.crowdFund.price().then(
                    r => this.price = this.web3.utils.fromWei(r)
                )

                // 获取众筹截止时间
                this.crowdFund.endTime().then(r => {
                    var endTime = new Date(r * 1000)
                    // 把时间戳转化为本地时间
                    this.endDate = endTime.toLocaleDateString().replace(/\//g, "-") + " " + endTime.toTimeString().substr(0, 8);
                })

                // 获取众筹创作者地址
                this.crowdFund.author().then(r => {
                    if (this.account === r) {
                        this.isAuthor = true
                    } else {
                        this.isAuthor = false
                    }
                })
            },
            // 读者参与众筹的 join()函数
            join() {
                this.web3.eth.sendTransaction({
                    from: this.account,
                    to: this.crowdFund.address,
                    value: this.web3.utils.toWei(this.price)
                }).then(() =>
                    this.getCrowdInfo()
                )
            },
            // 读者赎回的 withdraw()函数
            withdraw() {
                this.crowdFund.withdraw({
                    from: this.account
                }).then(() => {
                    this.getCrowdInfo()
                })
            },
            // 创作者提取资金的 withdrawFund()函数
            withdrawFund() {
                this.crowdFund.withdrawFund({
                    from: this.account
                }).then(() => {
                    this.getCrowdInfo()
                })
            }
        }
    }
</script>
2、与合约进行交互
前端界面与合约进行交互时,需要使用到 truffle-contract 及 web3 ,因为 Vue 工程本身也是通过 NPM 进行包管理,
因此可以直接通过 npm 进行安装,命令如下:
npm install --save truffle-contract web3如果创建vue项目的时候已经启动了vue项目 那么你需要重新启动一下vue项目 因为安装了包之后需要重新启动 这样使用import导入包的时候
才不会报错。
3、将智能合约项目编译产生的build文件夹放进vue项目中的public文件夹下 注意看上面的这句话
import crowd from '../../public/build/contracts/CrowdFunding.json';4、启动vue项目进行交互 看起来就像这样
npm run serve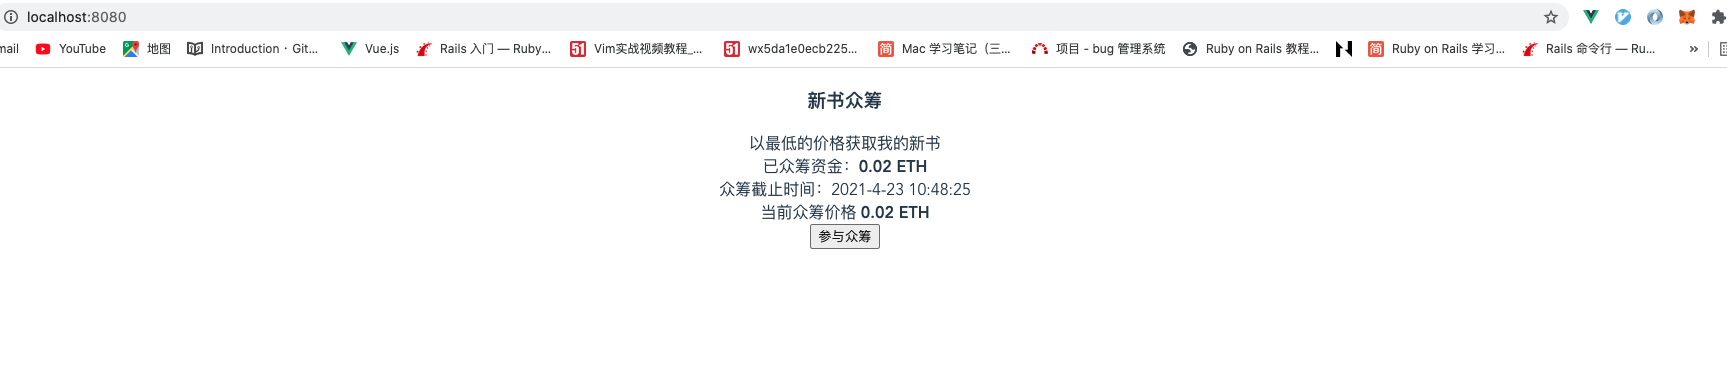
特别感谢一下博文
2、以太坊ETH-智能合约开发-solidity源码分析-truffle进阶